From Sketch to Vector: Digitizing Hand-Drawn Art
There’s a certain magic in hand-drawn sketches—raw, expressive, and full of personality. But once you’ve poured your soul into paper, what comes next? If you’re planning to use that artwork professionally—in logos, packaging, websites, or print—you’ll want to digitize it. And not just as a flat scan. We’re talking clean, scalable, endlessly editable vector graphics. The good news? You don’t need insane skills to make the leap from sketchbook to screen. Just the right process, a little patience, and the right tools.
So let’s break it down: how do you take your beautiful doodle, napkin scribble, or painstaking pencil illustration and turn it into a polished vector graphic that doesn’t lose its soul in the process?
Step 1: Start With a Clean Scan (or a Clear Photo)
Think of this as the foundation. You want a high-res version of your artwork to work from. If you’re scanning, shoot for at least 300 dpi in grayscale or black and white. If you’re using your phone, find good lighting, lay your paper flat, and avoid shadows. No one wants to vectorize a blurry, wrinkled ghost of a drawing.
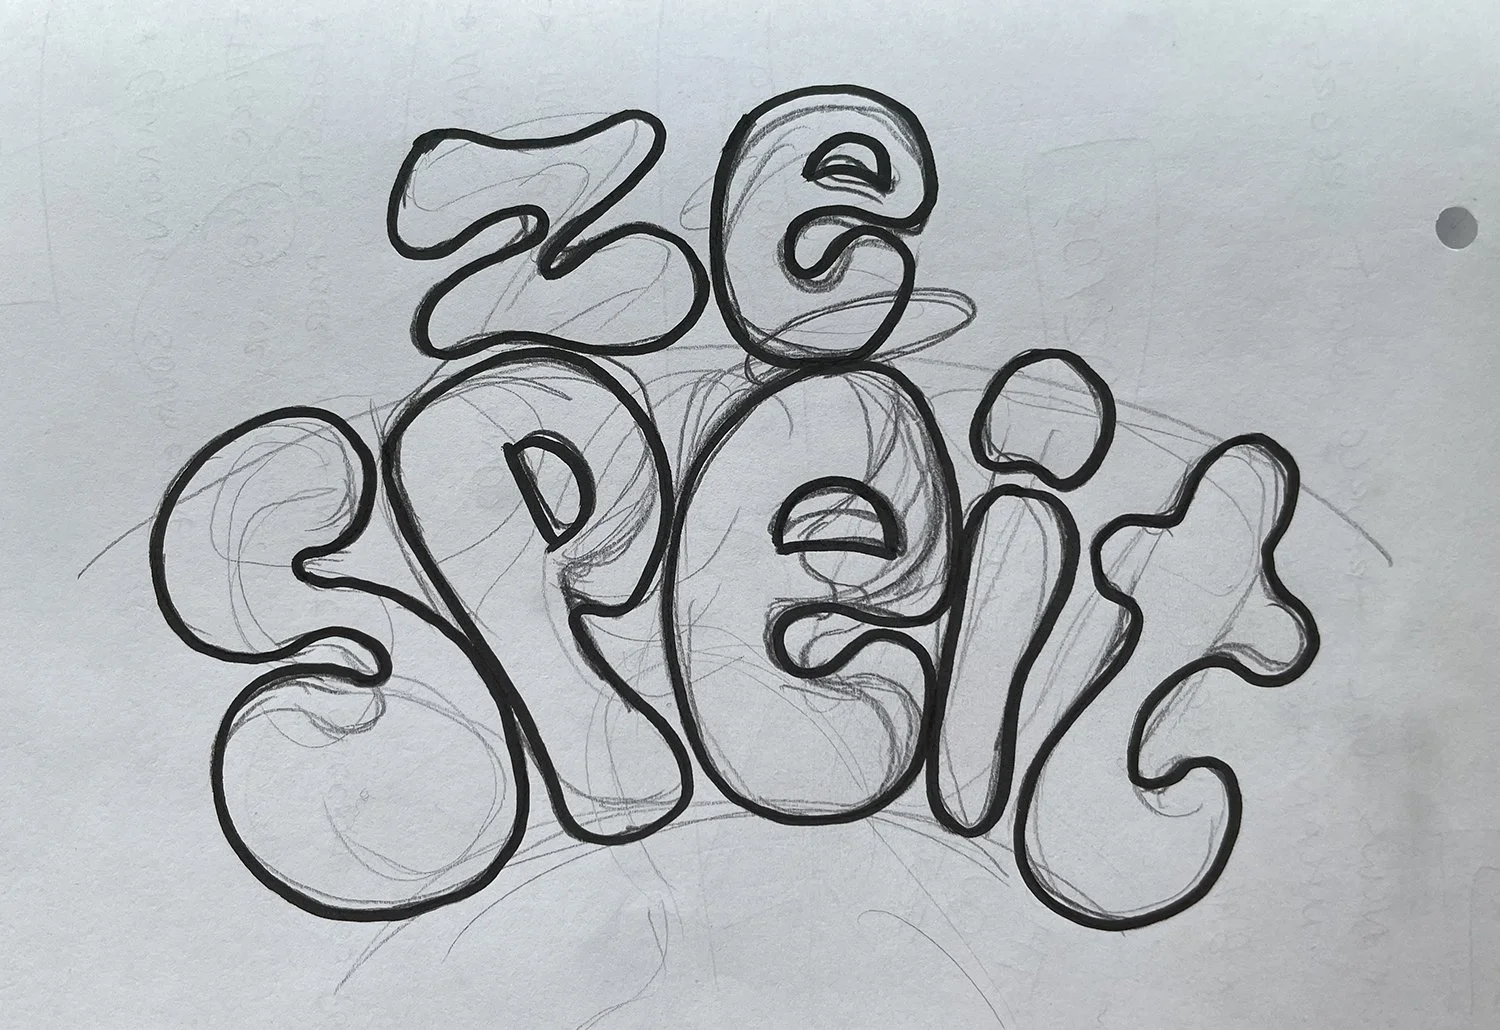
The original pencil sketch—this is where the creative process begins, messy lines and all © Vermeulen Design Studio
Step 2: Vectorize in Illustrator (Two Ways, Depending on Your Artwork)
Once your sketch is digitized, bring it into Adobe Illustrator. Now you’ve got two solid paths forward—and which one you choose depends on the type of artwork you're working with.
Option 1: Image Trace – Best for Organic, Textural, or Messier Sketches
For artwork with lots of texture, soft edges, or varying line weights, start with Image Trace. This tool auto-magically converts your raster image into vector shapes. It’s not perfect, but it’s a great starting point. You'll want to play with the settings—“Sketched Art” works well for fine lines, while “Black and White Logo” is great for high-contrast drawings. Expect a bit of trial and error, but when it clicks, it’s pretty satisfying.
Once you’ve dialed in the look, hit Expand. That turns your traced image into actual vector paths you can edit. Now it’s cleanup time—remove weird anchor points, simplify shapes, and make things crisp using the Direct Selection Tool (the white arrow).
Option 2: Manual Tracing with the Pen Tool – Best for Clean, Geometric, or Minimal Designs
If your sketch is clean and relatively simple—think straight lines, smooth curves, or geometric shapes—you might skip Image Trace altogether and go manual with the Pen Tool. Yes, it’s a bit more hands-on, but it gives you total control over every point and curve. It’s ideal for logos, icons, and anything where you want precision and polish.
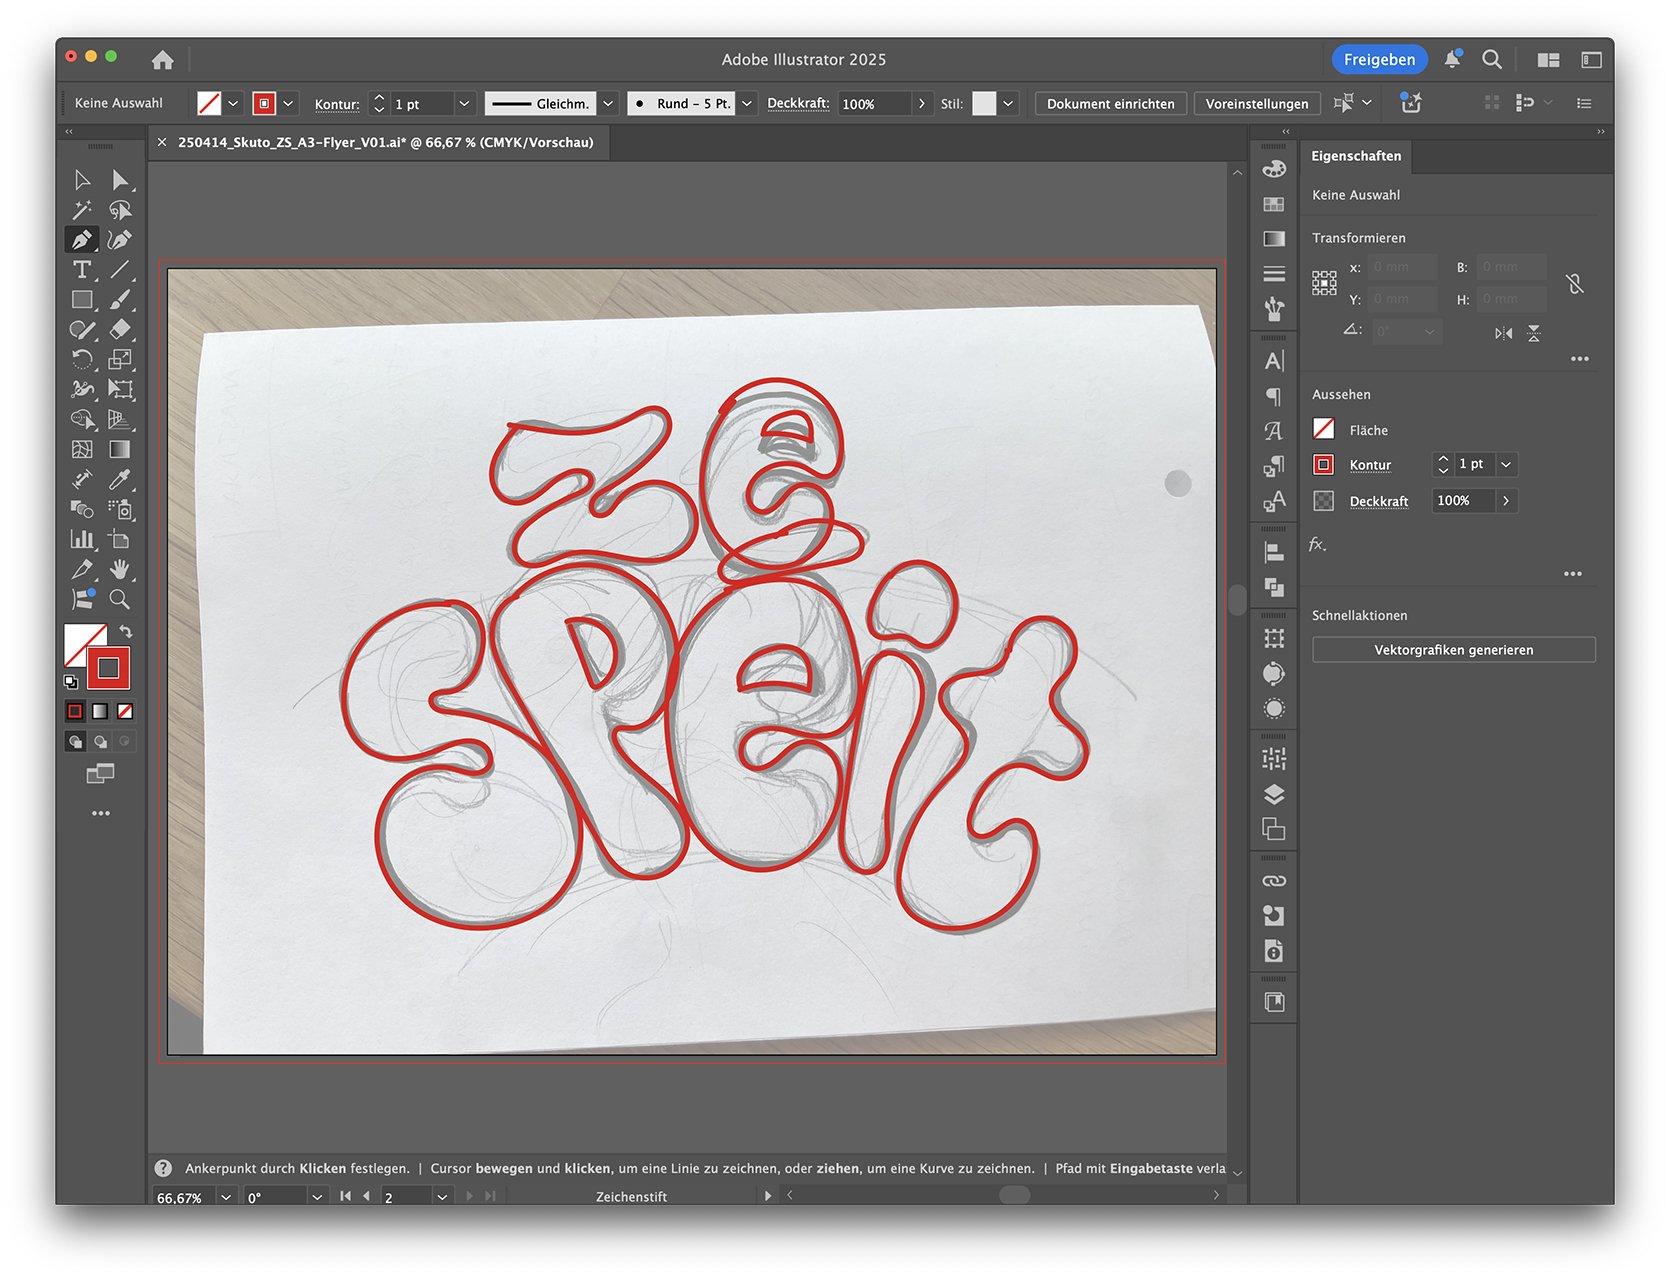
Tracing the sketch in Adobe Illustrator using the Pen Tool for smooth, clean vector paths © Vermeulen Design Studio
Think of it like this: Image Trace is fast and flexible, great for expressive or complex lines. The Pen Tool is surgical and clean, perfect for control freaks (in a good way). Neither is “better”—they just suit different needs.
Step 3: Coloring and Exporting
Once your vector is looking clean, you can start adding color. Use the Paint Bucket or shape fills, depending on how your paths are structured.
Save your final artwork in formats that keep the vector data intact—AI, SVG, or EPS are your friends. If you're handing it off to someone who isn’t using design software, also export a PNG or JPG for web use.
Step 4: Endless Possibilities
Once your artwork is vectored, the real fun begins. You’ve now got a scalable, editable, crystal-clear version of your original sketch—ready for just about anything. Want to slap it on a poster? Go for it. Resize it for business cards? Easy. Animate it for your website? Sure. Make it 3 stories tall without losing quality? Absolutely.
Vector graphics give you complete creative freedom. You can recolor, reshape, layer, or repurpose the artwork across digital and print formats—without ever going back to the drawing board (literally). From custom merch to slick social graphics to full-on branding systems, your once-humble sketch is now a design asset with serious range.

The final design in action: digitized, polished, and ready to promote an album release © Vermeulen Design Studio
Digitizing your sketch doesn’t mean killing its character. Done right, vectorization elevates what’s already there—giving you a flexible, high-quality file that’s ready to be resized, recolored, and reused endlessly. Whether you’re designing a brand, selling prints, or just trying to preserve your sketchbook masterpiece for the digital age, the process is totally doable (and actually kind of fun).
And hey, if the Pen Tool makes your eye twitch, or you’d rather spend your time creating instead of cleaning up anchor points, I’m here to help. Whether you need a custom vector logo or help turning your art into scalable files, just reach out. We’ll make sure your sketch looks its best—at any size.